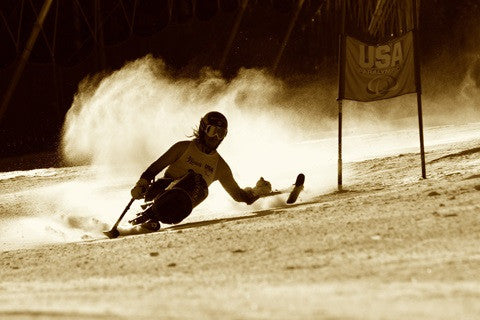
For many sit skiers, after a “one size fits all” shock setting has been found then the shock's dials are ignored and the suspension stays out of sight and out of mind. Below is a quick and dirty guide to tune your suspension and find a good base setting for most ski days. This tuning method can be replicated on fresh powder days, stale ice days and everything in between to hone in your suspension for whatever conditions exist.
Before You Begin
-
The session may seem monotonous, but pick one run on a day when conditions are to your liking and keep that variable unchanged.
-
Take notes! Documenting what settings you are at and how they feel through the day will help you keep track of what works and what doesn’t.
-
One turn of a shock’s dial is accompanied by a click which indicates you’ve made a change. Clicking through your entire settings will help you realize how many adjustments are available and where the middle is at.
-
Keep in mind that this is a process and taking the time to go through the steps chronologically will pay off in knowledge gained about how your suspension performs.
Step 1: Set Your Sag
Arguably the most important step, if the sag isn’t set correctly then your sitski will not perform to its potential. It’s vital that the spring’s rated weight correlates with the user’s body weight. If your spring is rated for the wrong weight, you’re going to have a bad time.
Attach your sit ski to its ski(s) on a level surface. You won’t be touching the dials while setting sag, only the adjustable ring to regulate the spring’s compression on the shock body. Start by twisting the adjustment ring in small increments to tighten or loosen the spring’s compression on the shock. Tightening the ring compresses the spring which translates to a supportive ride. Loosening the ring allows the spring to expand which makes for a responsive ride. The spring adjustment ring should never be loosened to the point of being able to spin freely on the shock, nor should it be tightened to the point of allowing for coil binding on the spring (coils rubbing against each other when compressed).

Transfer into the sitski and bounce to eliminate stiction before settling. Have a buddy check the suspension’s compression while you’re seated; this may require multiple tries. Finding a balance between supportive and responsive is ideal when searching for that base setting. The sweet spot is achieved when the spring is held firmly in place and the shock compresses about 30% with the skier seated. If you are the only person riding your sitski you shouldn’t have to adjust sag again. Programs may need to re-adjust based on the fluctuation of skier’s weights.
Step 2: Tune the High Speed Compression
High Speed Compression or HSC is the shock setting that soaks up big impacts. Think about hitting a mogul and the subsequent impact from that feature. Your HSC eats up that impact to prevent the suspension from bottoming out which keeps you ready for the next obstacle. A little HSC can go a long way and the goal is to use as little HSC as necessary to prevent bottoming out.
Time to ski! Set your High Speed Compression at zero, and the Low Speed Compression and Rebound in the middle and take a run. Don’t go send a 15’ kicker, you’ll bottom out and likely ruin your suspension**. With the other knobs still set in the middle, adjust the High Speed Compression a click up from zero for the next run. Take notice of the difference from the HSC being set at zero. You should experience less chance of bottoming out. Keep cranking the HSC up a turn at a time until you are no longer bottoming out at all. Keep taking runs and notes while playing with the HSC adjustment on different terrain and when you find a setting that works, leave it there. We settled on a HSC of 2 for the Monique Monoski.
**If you do plan to send 15’ kickers (looking at you Trevor) be sure to start small and work your way up to understand which HSC settings apply to which size jump and apply the correct amount of HSC before sending.
Step 3: Tune the Low Speed Compression
Low Speed Compression or LSC is the shock setting that constantly works to keep you riding plush or stiff depending on the day’s terrain. Too little LSC and you will be in for a sloppy, overly plush ride. Too much LSC and you will be jarred by the stiff suspension.
Try a run with the LSC and Rebound in the middle, and the HSC in its new setting. Changing the LSC in increments of 5 clicks works well. If you are skiing groomers you will probably want to stiffen the suspension by turning up the Low Speed Compression dial. The stiffer LSC will prevent the suspension from over compressing through groomed turns. If you are skiing a powder or packed powder day then turning down the LSC will allow for a plusher ride. The lower LSC setting will allow your suspension to soak up the dips into fresh pow or chunky snow as you work your way down the hill. We found that a LSC about 5 clicks up from middle rode well for our Monique monoski on packed powder. Pick a LSC setting that you like and keep it there.
Step 4: Tune the Rebound
The Rebound setting determines the rate that your shock returns to its “ready” position after the shock has absorbed an impact. The optimal Rebound setting allows for a smooth and controlled return. Too little or too much Rebound will leave your sitski’s suspension operating poorly because the Rebound will over or undercompensate on the return to that “ready” position.
With the HSC and LSC unchanged from the settings you found, take some turns with the Rebound in the middle and note the feel. If you feel as though you are getting stuck in your turns and the shock is not resetting quickly enough you should turn down the rebound to quicken its return speed. If it feels like you’re getting bucked on the landing after hitting an obstacle and you keep bouncing down the hill then the rebound is likely too fast and you should turn up the Rebound dial to slow its return. We found that the Monique skied best with a Rebound setting about 5 clicks below max. Everyone skis differently, so be sure to try a range of settings and pick the one that you liked best.
Keep in mind that all shocks are different and some rebound knobs do not have clicks but rather require an entire rotation for 1 adjustment. Our Monique 1 Monoski will be delivered with the shock pre-tuned, so you won't have to touch a thing.
Voilà! You should now have a base setting for your shock. Every make of shock and every skier is different, so your settings most likely won’t be the same as the ones we settled upon. We tuned the Monique’s suspension on the blue run, High Noon at Arapahoe Basin during packed powder conditions.
Written by Scott Will
Links
Disclaimer: This blog is intended to be a loose introduction for those learning how to tune their shock. For detailed tuning steps and information about your shock, be sure to consult the shock manufacturer and owner’s manual. Happy shredding!
Leave a comment
Also in ET Blog
Corvallis Sister Cities Association partners with Uzhhorod, Ukraine
April 28, 2026
In 2025, after learning about the tens of thousands of amputations that have resulted from the war in Ukraine, I designed and administered a program of adaptive skiing through Corvallis Sister Cities Association (a 501c3 organization), which has had a sister city relationship with Uzhhorod, Ukraine for over 30 years. I wanted to introduce 3-track and mono-skiing so vets could ski completely independently. We collaborate with Veterans Alliance, a national Ukrainian organization based in Ki’iv. Another organization began work in Ukraine at about the same time as ours, and adaptive skiing is spreading very quickly across the Carpathian Mountains.
Our program brought 5 amputees and two certified Ukrainian ski instructors to Oregon in 2025 to learn (and learn to teach) 3-track. One of the instructors returned this year in January to learn mono-ski and bi-ski. During the 2026 ski season in Ukraine, the veterans who learned in the United States all skied, many more took lessons to learn 3-track skiing, and a few double amputees even learned learned mono-skiing.
We have sent some more outriggers, but we still need more. Kris (our Ukrainian instructor) is teaching other instructors and wants to get outriggers to their ski areas so there will be adaptive lessons available at areas all over the Country.
In addition to outriggers, we also need bi-skis, extra seats in good condition, skis for bi-skis, and short bi-ski outriggers.
I have seen both the physical AND mental conditions of the amputees vastly improve with skiing. There is not much money left in the adaptive skiing program budget, so I am hoping we can get donations and used equipment to the Ukrainians. Thank you for your consideration.
Below is a video of the program in Oregon last year.
Carol Paulson
Corvallis Sister Cities Assn. Adaptive Skiing Project
https://www.centraloregondaily.com/news/in-focus/ukrainian-veterans-adaptive-skiing-oregon-hoodoo/article_a20ae6fa-0043-11f0-befe-8b43f5cbb3b6.html
https://sistercities.corvallis.or.us/uzhhorod-ukraine/
Continue reading
How to: Tune Your Suspension
February 22, 2019
For many sit skiers, after a “one size fits all” shock setting has been found then the shock's dials are ignored and the suspension stays out of sight and out of mind. Below is a quick and dirty guide to tune your suspension and find a good base setting for most ski days. This tuning method can be replicated on fresh powder days, stale ice days and everything in between to hone in your suspension for whatever conditions exist.
Before You Begin
The session may seem monotonous, but pick one run on a day when conditions are to your liking and keep that variable unchanged.
Take notes! Documenting what settings you are at and how they feel through the day will help you keep track of what works and what doesn’t.
One turn of a shock’s dial is accompanied by a click which indicates you’ve made a change. Clicking through your entire settings will help you realize how many adjustments are available and where the middle is at.
Keep in mind that this is a process and taking the time to go through the steps chronologically will pay off in knowledge gained about how your suspension performs.
Step 1: Set Your Sag
Arguably the most important step, if the sag isn’t set correctly then your sitski will not perform to its potential. It’s vital that the spring’s rated weight correlates with the user’s body weight. If your spring is rated for the wrong weight, you’re going to have a bad time.
Attach your sit ski to its ski(s) on a level surface. You won’t be touching the dials while setting sag, only the adjustable ring to regulate the spring’s compression on the shock body. Start by twisting the adjustment ring in small increments to tighten or loosen the spring’s compression on the shock. Tightening the ring compresses the spring which translates to a supportive ride. Loosening the ring allows the spring to expand which makes for a responsive ride. The spring adjustment ring should never be loosened to the point of being able to spin freely on the shock, nor should it be tightened to the point of allowing for coil binding on the spring (coils rubbing against each other when compressed).
Transfer into the sitski and bounce to eliminate stiction before settling. Have a buddy check the suspension’s compression while you’re seated; this may require multiple tries. Finding a balance between supportive and responsive is ideal when searching for that base setting. The sweet spot is achieved when the spring is held firmly in place and the shock compresses about 30% with the skier seated. If you are the only person riding your sitski you shouldn’t have to adjust sag again. Programs may need to re-adjust based on the fluctuation of skier’s weights.
Step 2: Tune the High Speed Compression
High Speed Compression or HSC is the shock setting that soaks up big impacts. Think about hitting a mogul and the subsequent impact from that feature. Your HSC eats up that impact to prevent the suspension from bottoming out which keeps you ready for the next obstacle. A little HSC can go a long way and the goal is to use as little HSC as necessary to prevent bottoming out.
Time to ski! Set your High Speed Compression at zero, and the Low Speed Compression and Rebound in the middle and take a run. Don’t go send a 15’ kicker, you’ll bottom out and likely ruin your suspension**. With the other knobs still set in the middle, adjust the High Speed Compression a click up from zero for the next run. Take notice of the difference from the HSC being set at zero. You should experience less chance of bottoming out. Keep cranking the HSC up a turn at a time until you are no longer bottoming out at all. Keep taking runs and notes while playing with the HSC adjustment on different terrain and when you find a setting that works, leave it there. We settled on a HSC of 2 for the Monique Monoski.
**If you do plan to send 15’ kickers (looking at you Trevor) be sure to start small and work your way up to understand which HSC settings apply to which size jump and apply the correct amount of HSC before sending.
Step 3: Tune the Low Speed Compression
Low Speed Compression or LSC is the shock setting that constantly works to keep you riding plush or stiff depending on the day’s terrain. Too little LSC and you will be in for a sloppy, overly plush ride. Too much LSC and you will be jarred by the stiff suspension.
Try a run with the LSC and Rebound in the middle, and the HSC in its new setting. Changing the LSC in increments of 5 clicks works well. If you are skiing groomers you will probably want to stiffen the suspension by turning up the Low Speed Compression dial. The stiffer LSC will prevent the suspension from over compressing through groomed turns. If you are skiing a powder or packed powder day then turning down the LSC will allow for a plusher ride. The lower LSC setting will allow your suspension to soak up the dips into fresh pow or chunky snow as you work your way down the hill. We found that a LSC about 5 clicks up from middle rode well for our Monique monoski on packed powder. Pick a LSC setting that you like and keep it there.
Step 4: Tune the Rebound
The Rebound setting determines the rate that your shock returns to its “ready” position after the shock has absorbed an impact. The optimal Rebound setting allows for a smooth and controlled return. Too little or too much Rebound will leave your sitski’s suspension operating poorly because the Rebound will over or undercompensate on the return to that “ready” position.
With the HSC and LSC unchanged from the settings you found, take some turns with the Rebound in the middle and note the feel. If you feel as though you are getting stuck in your turns and the shock is not resetting quickly enough you should turn down the rebound to quicken its return speed. If it feels like you’re getting bucked on the landing after hitting an obstacle and you keep bouncing down the hill then the rebound is likely too fast and you should turn up the Rebound dial to slow its return. We found that the Monique skied best with a Rebound setting about 5 clicks below max. Everyone skis differently, so be sure to try a range of settings and pick the one that you liked best.
Keep in mind that all shocks are different and some rebound knobs do not have clicks but rather require an entire rotation for 1 adjustment. Our Monique 1 Monoski will be delivered with the shock pre-tuned, so you won't have to touch a thing.
Voilà! You should now have a base setting for your shock. Every make of shock and every skier is different, so your settings most likely won’t be the same as the ones we settled upon. We tuned the Monique’s suspension on the blue run, High Noon at Arapahoe Basin during packed powder conditions.
Written by Scott Will
Links
Disclaimer: This blog is intended to be a loose introduction for those learning how to tune their shock. For detailed tuning steps and information about your shock, be sure to consult the shock manufacturer and owner’s manual. Happy shredding!
Continue reading
We Have a New Mono-Ski!
August 22, 2018 1 Comment
Mononique, Mystique, Funtastique… the name is still being sorted out, but our NEW Mono-Ski is beginning production and is slated for action this coming winter. Building off of the success of the Dynamique Bi-Ski, we have integrated some familiar features to bring you a program friendly mono-ski. This rig is stable for new skiers to learn on, easy to chairlift load and quickly adjustable while still having enough guts to rip just about anywhere on the mountain.
These days mono-skis are trending towards higher ride heights. While a high ride height is great for quick edge to edge control and World Cup skiers, it leaves something to be desired for those new to the sport. Our NEW Mono-Ski sits at under a foot off the ground; approximately 3-6" lower than most current mono-skis. This low center of gravity is stable, forgiving to form flaws and promotes a slower transition from edge to edge while turning. Drawing from what we learned with the Dynamique we looked to carry over many proven features to the NEW Mono-Ski such as the chairlift loading system, adjustable footrest, swap-able seats, adjustable dump and versatile frame sizing. The NEW Mono-Ski can be quickly and easily adjusted to accommodate everyone from kids to adults.
Trevor Kennison helps test at Arapahoe Basin while Bobby Luscinski observes the rig.
With our project direction established, we began work in CAD and built our first prototype. On snow testing began on a (rare for this year) powder day at Keystone Resort. Keystone’s gentle drawn-out runs felt similar to what new skiers can expect to learn on. The ride height functioned exceptionally, but the chairlift loading system left us looking a bit foolish.
Solidworks allowed us to visualize the chairlift position and translate what we felt on the slopes into a better ski.
Back in Denver we reviewed, tweaked and worked towards a second prototype. To improve the chairlift load system we lowered the lock out height, moved the balance point and increased shock support in the "up" position. We set off to Arapahoe Basin on a blue spring day and tested the redesign with promising results.
June 1st and Aprapahoe Basin still had plenty of coverage for testing.
Abasin’s north-facing terrain allowed us to continue testing well into summer. For prototype 3, we continued to tweak geometry to improve skiing and the chairlift load. Going into June we were thrilled with the low ride height and that the chairlift loading system had vastly improved from the first test day. The current rendition of the chairlift loading system is smooth, locks out crisply and is easy to operate. This translates to less rider/instructor fatigue and more runs down the mountain!
Trevor in his original KBG & Chris Witte, our GM, in the new Mono-Ski at Arapahoe Basin.
For our 4th prototype, we hoped to hone in on a winning suspension. Using the same geometry as the 3rd prototype, we integrated a rocker driven suspension. We logged a handful of days on both prototypes with a spectrum of different skiers. This allowed us to compare falling rate (prototype 3) vs. progressive suspension (prototype 4).
Not all designs make it to production... Prototype 4 tested a progressive rocker driven suspension. It improved sensitivity and bottom out support but was too costly for this project.
Ultimately, price point and our target customers helped steer the final design of the 2018 testing season. While we liked how the progressive rocker driven prototype performed, its manufacturing complexity left us feeling it didn't fit this project. As luck would have it, MRP (Dynamique shock supplier) is finalizing a progressive coil spring. With MRP's new coil spring, we can provide the support missing from prototype 3 without the complexity of prototype 4. We feel this will be the compromise between price point and performance our target customer is likely looking for.
Bobby, our engineer, logged a handful of days learning the subtleties of the design.
In the meantime we started to CNC components, water-jet cross braces and bend frames. We are looking forward to starting full production on the NEW Mono-Ski at the beginning of the 18/19 winter season!
The first production parts are trickling in! To accommodate programs, a 325mm boot sole length aligns with the RESNA suggested standard while mounting holes allow 3" of center of gravity adjustment within a slot.
The NEW Mono-Ski is available with a low frame, like the prototypes, or with a high frame which includes a handle bar and tether points.
What should we name our NEW Mono-Ski? Keep an eye out on Instagram & Facebook for your chance to comment a name for our NEW Mono-Ski! We will be taking name suggestions until October 1st. We like the idea of staying with the “-ique” ending trend, but all submissions will be considered. After Oct. 1st we'll pick 5 names and hold a customer vote for #1 this winter!
Scott Will, our account rep, gives the NEW Mono-Ski two thumbs up.
BIG THANKS TO TESTERS TREVOR & CHARLEY, AND TO ALL OF THE LIFTIES WHO DEALT WITH OUR CHAIRLIFT STRUGGLES.
Written by Scott Will
Continue reading